Tuesday, December 30, 2008

Rockin' with Rub-ons!


So, I'm totally hooked on Guitar Hero! We're having a little Guitar Hero party for New Year's Eve! :) The guitar comes with stickers, but I thought it would be even cuter with the Anchored Rub-ons. Click to see more detail...how perfect is the "Superstar" rub-on?!

Friday, December 26, 2008


Christmas Eve and Day were very exciting and fun filled for my family. I dropped by to visit and bake with friends, then we heading off to visit with my husband's side of the family, which was extra special since his sister secretly flew in Charlie's brother and family from NC. We had just been saying how sad we weren't that this was their first Christmas away from us...so there were more tears when they showed up! :)

On Christmas Day, the kiddos opened their many gifts from Mommy, Daddy and Santa...what a mess! Their favorite gifts were their scooters. I got a laptop and new camera "for my Stampin' Up! stuff." We then went to my parents' to visit with my side and stayed for such a long time...we were all rocking out to Guitar Hero...guess what my hubby bought today on his lunch hour?!!

I hope everyone had a wonderful Christmas with their family!

Monday, December 22, 2008

Altered Candles


Although my hubby made his own frames for some of the gals at work, he commissioned me to fancy up these candles. He liked the "Gratitude" stamp from the Define Your Life stamp set, so I incorporated that. I used DSP, Berry Bliss, since I had just enough to cover these...I used to NEVER use retired stuff, but I'm trying to get over that! I used the Tag Punch with an eyelet set at the top...love that trick of making the tag longer if you wish.

My hubby made this...


This year, my husband wanted to create some of his own gift for coworkers, and this is one of the 3 frames that he made...pretty good, huh?!

Thursday, December 18, 2008

Gift for my Son's Teacher


Here is part of my son's teacher's gift for Christmas. I've never covered the tops of the lunchbox tin, but I have the template, so I decided to give it a try...added a bit more color. I used the Bella Rose paper and coordinating colors. The cards are to give her a little head start on organizing her cards...hope she likes it!


Monday, December 15, 2008

Mrs. Big Shot (aka Stephanie)


I thought it would be fun to show a little customer appreciation on my blog. This is Stephanie, a Technique Club member, that has added a lot of fun to stamping.
She's about as obsessed as I am and was the first customer to get the Big Shot...I'm jealous that she has more dies than I do...and the Doctor Bag!...but she's always offering to share her supplies.
She's a newly wed and always makes adorable gifts for family, friends and coworkers.
You rock, Stephanie!

Tuesday, December 9, 2008

RETIRING STAMPS LIST-10% off & Free Shipping Offers

The Retiring Stamp Sets List is here! You can get these sets at 10% off if you order between December 9-23! Click here to check out the list and adjusted prices: http://www.stampinup.com/us/documents/US_10_percent_off.pdf


AND...Stampin' Up! is also offering FREE SHIPPING on all orders of $70 or more during this time. Call or email me to place your order OR log onto my website and shop online to have it directly shipped to you!
email: AimeeG18@aol.com
website: http://www.stampinup.net/esuite/home/stampingwithaimee/

Monday, December 8, 2008

December Scrapbook Club Layout

My Scrapbook Club is always "a month behind" so they can bring their photos to throw onto the completed pages. This layout is simple and quick! These photos are from 2 years ago...time flies!

December Technique Club


One of my Club members, Stephanie, gave me this little tea packets and told me to "do something with it"...so I did! I used Kiwi Kiss and Pacific Point ink and cardstock and wrapped the tea pack, then attached the ribbon to make it into a cute little tote. It is closed with a tiny piece of Velcro as well. The card is a Waterfall Card, and the gals loved it. We stamped 4 different images in Versamark then applied the Stampin' Pastels to add color. The "t" on the little card is chipboard that was inked up with the Whisper White ink.

Sunday, December 7, 2008

Christmas

Here's Gaby and Gordon, just before we left to Gaby's Christmas Program. She was so funny...she did all the hand movements and would smile and wave to me during the performance, but didn't sing a word! :) They looked so cute and sweet that night.

Tuesday, November 18, 2008

November Technique Club Projects


Click to see detail on the card...we dry, blind embossed the flowers onto the Kiwi Kiss cardstock with the Seeing Spots Classy Brass Template. The circle is the 1 3/4" punch and the Designer Paper is from the Level 1 Hostess Paper Pack in Kraft. I finally made my first spirals inside the card...my husband asked, "but where do you write?" lol
We also made the altered Starbucks bottles and a jumbo tag or ornament out of old CD's. It's always fun to use the Crop-A-Dile to punch through plastic or tin.


November Scrapbook Club Pages


This is the cute, and very simple layout my "Sassy Scrappers" club made this weekend. We used the Color Spritzer Tool on the title mat and did the faux stitching on one photo mat...seemed to go with the theme. We always scrapbook a month behind so they can bring their photos to throw onto their completed pages. I make 2 layouts each month...one for each of my kids. Here's Gordon, my little scarecrow. My little Gaby was Dorothy, of course. :) (Can you tell I love my new 1 3/4" Circle Punch?!)

Monday, October 27, 2008

Christmas Cards


Designing these cards was just too fun! The Christmas Trees are actually party hats from the "Party Hearty" stamp set...the tree trunk for the red tree is the candle that comes in that set! I totally CASE'd this card from Corie U....thank you! The Peace card is CASE's from the Duarte meeting, but had no name on the swap to give credit. All cards were made with the "Ski Slope" Designer Paper from the Holiday Mini Catalog and I used the Big Shot on many cards as well. My ladies will make 2 of each design...10 cards total...can't wait...I have to offer 2 classes because of the demand...love that! :) CLICK ON PHOTO to see each card in more detail.


Halloween Treats

These Halloween bags were a snap to make with the "Top Note" die and the Big Shot machine. I used retired paper and stamped various images from the "Batty For You" stamp set, then punched with the 1 1/4" Circle Punch and matted that onto a black piece of cardstock that I punched with the Scallop Circle Punch. I used the regular Snail adhesive. The "Happy Halloween" greeting is from the "All Holidays" stamps set and is punched with the Oval Punch. These are from my son's Kindergarten classmates...hope they like them...I didn't want to use candy, and I still had boxes of crayons that I stocked up on during the summer. These are the small size cellophane bags that SU! sells.

Saturday, October 25, 2008

Happy Fall

Here are my little ones at my son's Fall Festival that was at his school. They had fun and got to run to run around with Mommy, Daddy, Granny & Papa.
I'll post the cards for my Christmas "Cards & Cookies" class soon...I just finished designing them and typing out directions/recipes today.

Monday, October 13, 2008

Baby Book Memory Book


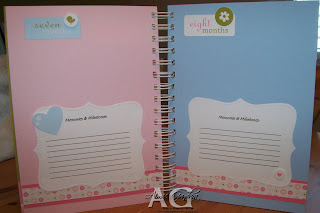
I had my Baby Book Class this weekend...the ladies loved their books. This book is just like the Baby Girl Book, just using the Rock-A-Bye Baby Boy Simply Scrappin' Kit instead...I ended up liking the Boy book even more than the girl book...the colors are just so darn cute! The last ("I'm One") page has a pocket for journaling, and a photo can go right on top of the pocket. This is such a fun book to make...only half of a Simply Scrappin' Kit too! One of the gals that came made her book for here baby that's only a few weeks away from being born. Key Dimensions for this book: The book is 8.5" x 6". For the cover, the Tangerine Tango strip is 2 3/4" tall. The ribbon won't go through the Bind-It-All machine, so just add it after binding with some Sticky Strip. Birth Page:Tangerine is 3/4", the chicks are 2" and the Old Olive is 3/4". For months 1 &2, cut the paper into a 1 inch strip and use the Scallop Edge Punch...save the thin strip and reverse to have some contrast. Months 3 &4: Tangerine Tango is 1/2" and the chicks are about 1/2" as well and the Bashful Blue is 3/4". Months 5 &6 use the self adhesive die cut strip along the bottom and add a 1" strip of the striped blue designer paper. Months 7&8: Old Olive is 1" and the Stars/Circles Designer paper is 3/4". Months 9&10: Tangerine Tango is 1 1/4" and the chicks paper is 1". Months 11&12: Stars/Circles paper is 1" and the Olive Star paper is 1/4". For the "I'm One" page: Chicks paper is about 2" x 6", the pocket is 3 1/2" x 4"...use the Scallop Edge Punch along the top, then adhere Sticky Strip to the sides and bottom only. The journaling will go on a sheet that's 4 1/4" x 2 3/4". The Old Olive strip on this page is 2" thick. I used the Jumbo Eyelets for the journaling sheet. Hope this was helpful!


October Club Projects/Halloween


These projects were so fun! I got the Mummy idea from Lorri H's blog (she's linked on the side of my blog). Isn't it too cute? We used the "Tearing Edge" tool from Stampin' Up! and cut strips into lengths of 3.5" with varying widths. We used Very Vanilla cardstock and just inked up the edges with Creamy Caramel Pastels and daubers. The little bag is just 5"x 5" squares of Orange cardstock that were adhered to a bag that is 3.5" tall. I used the "Say It With Scallops" stamp, but covered the greeting in the middle with Frankenstein punched by the 1"Circle Punch. The pouch used the Top Note Die from the Big Shot, with just a piece of folded cardstock...there are fruit snacks inside, and it's held together with Velcro...got this idea from a swap.


Tuesday, September 30, 2008

Altered Calendar


I decided to put the binding on my calendar, so I cut down the blue envelope to make the front and back cover. I think this is a bit easier to use without having to worry about the calendar pages falling out. The O Wires are 3/8".

Sunday, September 28, 2008

Create-A-Calendar


I was so excited when I first saw this "Create-A-Calendar '09 Kit" in the Holiday Mini Catalog. I sat down yesterday and cranked this out pretty darn fast. I just stuck to the samples shown in the mini catalog. I think this would also be great to bind at the top to make like a tablet, instead of storing the monthy claendars in the envelope. I would just cute the envelope a bit to make it the front and back covers. Isn't this an adorable and practical gift?! I will offer this class in November...too fun. The stamps and inks are the only items that were not included in the kit, which is only $7.95. I used Simply Said, Eastern Blooms and Flight of the Butterfly to add a bit more color to the calendar pages. The swatches of paper are the back sides of the calendar pages...everything is even precut for you!

Friday, September 26, 2008

Swaps for Downline Meeting

I didn't think I would get around to making swaps for the "Spaghetti Factory" meeting tomorrow that my #1 upline, Sandy Hancock, puts on...but I cranked out all 31 yesterday. I gave in and ordered the scallop square punch that coordinates perfectly with the free set, Say It With Scallops, that we got at convention. The cardstock is Kiwi Kiss, Chocolate Chip, and Very Vanilla. I used Whisper White Craft ink against the Chocolate Chip cardstock and the flowers were stamped in Regal Rose. I had just enough pink ribbon to make these cards...love that! I can't wait to get my swaps tomorrow...I'm hoping and guessing there will be some great swaps that use the Big Shot!!!

Sunday, September 21, 2008

World Card Making Day


Stampin' Up! is celebrating World Card Making Day with you. From October 4-11th, you can purchase any Simply Sent Card Elements or Simply Sent Card Kits at a 20% DISCOUNT!!!
These items are normally a fantastic value, but this is even better...don't miss out!
Call/email me with your order today.

Tuesday, September 16, 2008

September Club Projects


Here are the September Club Projects. My Technique Club made the card, Halloween notecard and envelope (using the Big Shot) and the candy bag with the topper and flower, also using the Big Shot. They all said how much easier the Big Shot was to use, compared to the older red machine...I agree!
The Scrapbook Club also used the Big Shot for the journaling area, which is the Top Note Bigz die and the little flowers on the left page were also made with the Big Shot. The stamped flowers and grass from the Inspired by Nature stamp set came out very pretty. We stamped the grass in Kiwi Kiss, then inked up the flowers with Baja Breeze, and used the Old Olive marker to fill in the stems and then using the daubers dipped in Pacific Point to add a little accent to the bottoms of the flowers.
I wanted to show off the die cut blooms and the Big Shot for these clubs.

Saturday, September 13, 2008

Baby Book Class: Take or Order

I am offering the Baby Book as a kit. You can check out photos of EVERY PAGE by scrolling down a bit. Payment for this book must be received by September 27th. Please send check and tell me if this will be for a girl or boy to: Aimee Gandara
14654 Sunnymead Dr.
La Mirada, CA 90638

Kit Options:

Plain Jane/John Kit-
-Bound book (I will cover the front and back w/ Designer paper and decorate the front cover only, then collate with the Bind-It-All machine
-12 "memories & milestones" sheets uncut
-Jumbo Eyelet, unset
-Ribbon included
-Half of a Simply Scrappin' Rock-A-Bye Baby Kit (Boy or Girl)
-You'll need dimesionals and sticky strip and Tag Punches

$15 to pick up $20 to have shipped to you


Add-on #1- Precut "Memories & Milestones," using the Top Note Die with the Big Shot
Add $2

Add-on #2- Precut Embellishments (Self-adhesive dies from the Simply Scrappin' Kit")
Precut Cardstock and Designer Paper for every page and set jumbo eylet
Add $3

Make it for me Molly/Manny- 100% Premade Book for you with leftover Simply Scrappin' Kit contents. Just pull out of the box and use!
$25 if you pick it up, or $30 to have shipped to you

Attend the Class and do it yourslef- Class will be Saturday, October 11th from 11:30-1:00 at my house.
$17 or only $15 for Current Club Members or my Downline

Sunday, September 7, 2008

Baby's First Year Book


The Baby's First Year Book is complete! I still had a decent amount of leftover cardstock, designer paper and die cuts left over. This book is 8 1/2" x 6". I decided to cover the inside covers with designer paper, as to not leave anything looking plain or unfinished. I did ZERO stamping for this project because my goal was to utilize the supplies included in the Rock-A-Bye Baby Girl Simply Scrappin' Kit. I
couldn't resist using my Big Shot though! I used to Top Note die for the journaling that will go on each month's page. The journaling for the first birthday page is a pocket...I wanted to make that a bit different from the other pages. Baby's picture can go on top of the journaling pocket for that page, and I left plenty of room on each month's page for a picture or two. I will offer this book as a CLASS or MAIL ORDER. Details to come soon! You can make this for a girl, or use the other Simply Scrappin' Kit that's for a baby boy. Click on any photo to see it larger, with more detail.