Friday, December 10, 2010

3 DAY DISCOUNT for Christmas Cheer Directions

Hi Stampers,
Here's a *NEW* class for you! You will receive full color PDF directions to make all 33 projects you see here. This is great for those of you creating projects just for fun, as well as the Stampin' Up! DEMONSTRATORS that are looking for a simple class with all the work done for you! PDF directions will be emailed to you. Simply click on the PayPal button below to get your directions at a special savings...only $11.99 when you get directions by December 13th!


Supplies (& Item Numbers) you'll need to create all projects:
117401 Christmas Cheer Simply Scrappin' Kit
119762 Marina Mist 5/8" Grosgrain Ribbon
104430 Stampin' Dimensionals
104249 Sticky Strip
Other: Paper Trimmer, Scissors, Bone Folder, Scoring Blade

Thursday, December 9, 2010

Top Note Christmas

This is a great card to use those scraps of Designer Series Paper on-I used the Christmas Cheer Simply Scrappin' Kit paper for this card. Simply punch out squares, line them up on card stock for a quilt look, then run through the Big Shot with the Top Note die. I love the new Glimmer Brads too!

Tuesday, November 30, 2010

Party Hearty & Builder Wheels


Here's another fun card, using the Builder Wheels-I left a space in the middle and the 5/8" grosgrain ribbon is just the right size to fill in the space! I used Melon Mambo and Chocolate Chip for the ink. The Melon Mambo card stock was embossed with the Elegant Bouquet Embossing Folder. The party hat (Party Hearty set) has a little rhinestone to add some bling. :)
Don't forget to check out my 33 Christmas Cheer projects and directions by clicking HERE.

Monday, November 22, 2010

Ribbon Rose Card

I love this card! It was CASE'd by LeAnn Greff. I added Dazzling Diamonds glitter to the ribbon rose for that extra bit of fun.

Friday, November 19, 2010

Big Shot HAIR!

One of my favorite stampin' pals, Stephanie, came over to make hair bows with me. It was my first time, so I still need a lot more practice! Here are the bows I came up with. :) I used brads and other embellishments that I had already and cut out various shapes from the Big Shot and did a tiny bit of stitching, then attached a hair pin to the back side of each bow. These could also be worn on a blouse with a pin. I plan to keep practicing.

Tuesday, October 26, 2010

Tote

This was such a fun little tote to make. I got the directions from Leigh O'Brien's tutorial on Splitcoast Stampers here. I used a retired DSP, but you can use whatever paper you like, and change up the design for every occasion.

Thursday, October 21, 2010

Tree Trimmings Card

The stamp set used for this card is called Tree Trimmings (Pg. 44 of the catalog) and is a beautiful stamp set. The greeting is from the Teeny Tiny Wishes set (Pg. 157). The Basic Rhinestones add a little Christmas magic to the card. :) This is a very simple and clean cut card. Hope you enjoy it!

Card stock: Not Quite Navy, Very Vanilla, Cherry Cobbler, Old Olive

Tuesday, October 19, 2010

Christmas Wine Bottle Topper


Who wouldn't love to get a dolled up wine bottle like this?! I CASE'd this adorable idea from Linda Joyce Steele; you can see her blog here. This would also make a cute door hanger, or Olive Oil topper. I used a square punch and the Word Window punch to make the snowman's hat. The antique brads give the scarf that perfect touch. My snowman reminds me of Tim Burton's characters! :)

Tuesday, September 28, 2010

Halloween Treat Holder

I wanted to create a cute Halloween treat box, so I searched online and found a great video tutorial here by the talented Dawn Griffith. It's so easy and cute! I used Rich Razzleberry, Old Olive and Pumpkin Pie for the card stock. I can't wait for Halloween!

Saturday, September 25, 2010

Sweet Snowglobe

This card was a lot of fun to make with my girls. We used the new Sweet Snowglobe stamp from the Holiday Mini Catalog, which coordinates with the treat cups. The Cherry Cobbler card stock and ink are perfect for Christmas. There is glitter inside the treat cup, so it feels like a real snowglobe. Christmas really is sneaking up quickly; start your planning!

Tuesday, September 21, 2010

Make Merry Milk Carton


I love this new Mini Milk Carton die from Stampin' Up! It only uses half a sheet of 8.5" x 11" and is a snap to assemble. I stamped on the Bashful Blue card stock, then added the tag to the mini clip with twine. To the tag, I added a rhinestone to give it a Christmas feel.

Thursday, September 9, 2010

Time for School!

My kids started school this morning. My big boy is in 2nd grade and my daughter is in Kindergarten (full day). It's been a rough morning, but I know they'll have a wonderful year. They really do grow up too quickly!

Monday, September 6, 2010

Homework Box

My baby girl, Gaby, is starting Kindergarten this week! I made her a homework box, using scraps that I had. I love having all of her supplies together so we don't have to waste time searching for materials when it's time to do homework. She's thrilled to start school and is very ready for Kinder. I have made these boxes for all of my nieces and nephews when they started school as well. :)

Thursday, September 2, 2010

Holiday Mini Catalog Items Now Available

The Holiday Mini Catalog is here!!! Now you can order great Fall, Halloween, Christmas (and more) supplies for your projects. You can check out the full catalog by clicking here. Remember, you can place your order ANY TIME at my online store HERE.

Wednesday, August 25, 2010

Colorful Butterfly Card

I love the Island Oasis Designer Series Paper...don't forget that you only have until the end of this month to order this paper and all other goodies from the Summer Mini Catalog! I used the new self adhesive pearls for the center of the die cut butterfly. I thought this card turned out to be a fun, colorful and happy card.

Sunday, August 22, 2010

Happy I Do Day


I love the new self adhesive rhinestones in the Stampin' Up! catalog! I thought the rhinestone would look perfect on the ring. The paper also happens to be the new "Blushing Bride" card stock. I spreyed the card stock (after using the Elegant Bouquet embossing folder) with Vanilla Shimmer Smooch Spray, which gave the card a pretty touch. Thanks for looking!

Friday, August 20, 2010

Live With Passion

Hi Stampin' Friends! I hope you're all having a wonderful summer like I am! :) I CASE'd this card from page 104 of the catalog, but changed out the blue so I could use the beautiful Pacific Point card stock. Thanks for stopping by today.

Wednesday, August 18, 2010

Video Recordings & PDF Directions Now Available for my Greenhouse Gala (Half & Half) Classes

Isn't the Greenhouse Gala Designer Series paper gorgeous?! (Click on photo to enlarge)

Learn how to create all the projects pictured above, with only half a pack of the paper and card stock! You'll recieve the videos of me demonstrating each project, and you'll also get all PDF directions when you purchase the classes. (Click on Buy Now button below)


Supplies needed for the projects:

117167 Greenhouse Gala DSP (Only half of pack)
119795 Pear Pizazz8.5 x 11 Card Stock (Half of pack)
119254 Daffodil Delight 1/8" Taffeta Ribbon
112580 Clips Assortment
118073 Fancy Flower Punch
Paper Cutter, Scissors, Adhesive, Sticky Strip, Stampin' Dimensionals
Optional: Bone Folder, Scoring Blade

Wednesday, August 4, 2010

Summer Fun Card

I needed a super quick and simple for my Technique Club since the other 2 cards were more detailed, so this is what I came up with. I love the Island Oasis DSP from the mini catalog. I used used the Island Floral die for the Big Shot to get quick flowers.

Monday, August 2, 2010

Butterflies

Here's another card that was totally CASE'd from the Stampin' Success magazine (a monthly magazine that Stampin' Up! demonstrators receive for free!). The creator is Stephanie Cadrette. I thought it was adorable, so we made this for my Technique Club this month. The butterflies were inked in Marina Mist, Melon Mambo and Concord Crush.

Saturday, July 31, 2010

Surfer Build-A-Bear

I LOVE this card! I totally CASE'd this card from my blogging stampin' friend, Rose Marie, who has a fantastic blog. Check out her card HERE. I didn't have the same paper that she used, so I decided to use a sponge and Whisper White craft ink to create an outdoor feel onto Marina Mist card stock. Also, I used Stampin' Up!'s new Log Cabin Smooch Spritz Spray to create a realistic looking sand base; it looks really great in person. Thanks for this great idea, Rose! :)

Saturday, July 10, 2010

L is for Love

Here's another fun card that my Technique Club members made last month. I CASEd it from the new catalog. :)

Thursday, July 8, 2010

NOW you get this class 50% off!

This is a great class to take or to offer, if you're a demonstrator. To create ALL the projects pictured above, you'll only need half of the following: pack of Old Olive card stock, pack of Island Oasis Designer Series Paper, and spool of Pumpkin Pie grosgrain ribbon. You'll also need a full pack of the Filigree brads. So, if you offer this class for your customers, you'll be able to offer an inexpensive class/camp since you're splitting 3 of the supplies in half!

When you purchase this class, you'll receive VIDEOS of me demonstrating each project, along with PDF directions. Demonstrators-wouldn't you love to just pass out the directions and put in little time for a fun class?

Click on the PayPal link below to purchase this class. This class was $25.00, now it's 50% off so that's only $12.50 for you.


Tuesday, July 6, 2010

Celebrate You Card

Here's a fun card that we made at my last Technique Club.

Card stock: Real Red, Pacific Point, Wild Wasabi, Chocolate Chip, Whisper White
Ink: Wild Wasabi, Chocolate Chip
Stamps: Party Hearty, Itty Bitty Bits
Accessories: Itty Bitty Shapes Punch Pack, 1" Circle & Scallop Circle Punches, Brad, Ribbon, Stampin' Dimensionals

Saturday, July 3, 2010

School Memories Book in Island Oasis


Now is a great time to start your album for your child. You can get the directions, or a KIT mailed to you. Click here to see a completed book and to order. The kit pictured above was made with the Island Oasis Designer Series Paper from the Summer Mini Catalog. (You can choose the paper that you'd like when you order the kit.)

Thursday, July 1, 2010

NEW Catalog is here!

If you haven't seen the new catalog, click on the photo here and enjoy!

Monday, June 28, 2010

Just for you Fancy Favor Box

I love this die for the Big Shot! This box is so easy to assemble and is a great size. I used the new Vanilla Shimmer Smooch Spritz on the pink flowers. The flowers and leaf were made from the new Island Floral die.

Card stock: Pretty in Pink, Kraft (soon to be "Crumb Cake"), Regal Rose and Certainly Celery.
Ink: Regal Rose
Stamps: Teeny Tiny Wishes
Accessories: flower brad, Fancy Favor Box and Island Floral dies, Word Window Punch, Vanilla Shimmer Smooch Spritz, Stampin' Dimensionals, Pretty in Pink grosgrain ribbon

Sunday, June 27, 2010

June Scrap Layout


Here's the layout for my monthly scrapbooking club that we made today. We used the Circle Circus stamp set, which always creates a fun and playful look. I had some Pacific Point card stock from over a year ago, so we got to use it since it's in the new catalog...yay! Click on photos to enlarge.

Tuesday, June 15, 2010

Tea Party

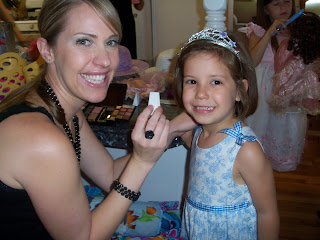
Gabriella's tea party was quite a success; the girls had a blast and danced up a storm. I got the adorable tea cup box idea from Cindy Villa, and added colorful marshmallows inside the box. I added pink ribbon to the chairs, food racks and other items to doll it up. We had a make-up station, as well as a manicure station; thank you Aunties! The girls also got to decorate their hats with flowers. They all looked so cute sipping their "apple juice" tea. My awesome husband made the cupcake topiary. I was glad to finally have her tea party. :)
To view her invitations that I made, click here.